1. There are many different Eclipse flavors and you will be given specific instructions from your professor on which one to choose and how to install it.
2. To work with CS GitLab server you will be using EGit plugin, which is usually by default, a part of any Eclipse installation.
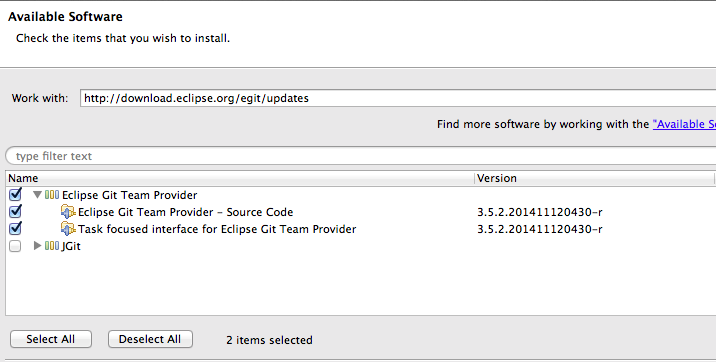
3. If the EGit plugin is missing you can install it via Help -> Install New Software from the following URL:
http://download.eclipse.org/egit/updates
Here is a screenshot::
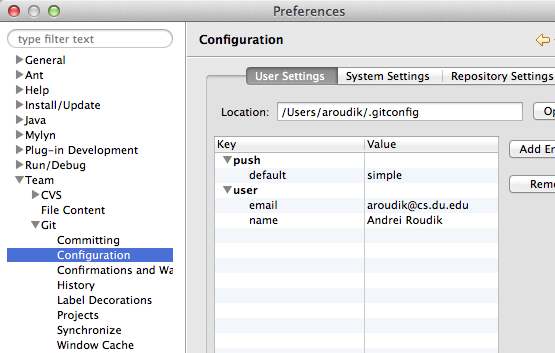
4. Configure your EGit plugin at Eclipse -> Preferences -> Team -> Git -> Configuration.
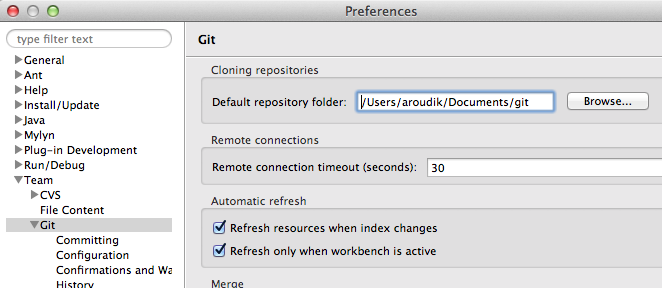
5. Set your default clone location
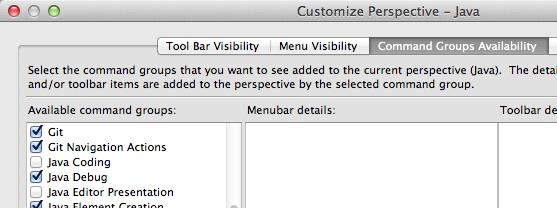
6. Activate Eclipse Git toolbar in Window -> Customize perspective
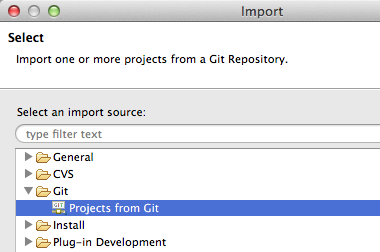
7. Assuming we created a project on the server as it is explained in Git Quick Start Guide let’s clone existing repository to your local Eclipse workspace. Select File -> Import -> Git -> Project from Git.
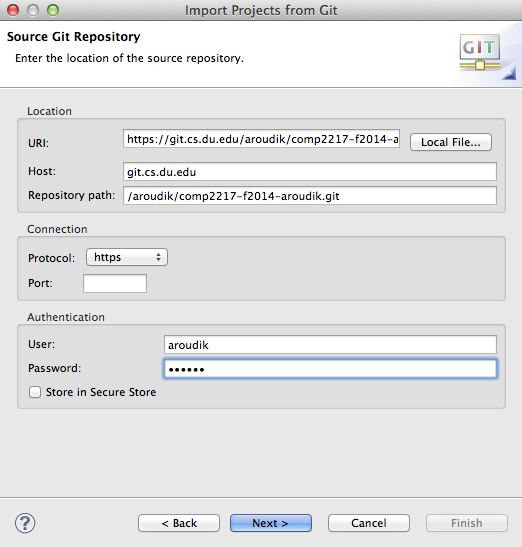
Select URI in the next dialog and paste the URL from your git.cs.du.edu Account -> Projects -> Activity
How to create and add your projects to the GitLab repository
1. Right click on a menu pane where your repository is located, click New -> Project, Folder or File
2. Save your new project or file you’ve just created into your local Git repository
3. Right click on a new file -> Team -> Commit. Type in your commit notes, check files that are going to be committed and click “Commit”. Your file is committed to your local Git repository.
4. Now we need to push your new project to GitLab server repository. Go to Window -> Show View -> Other -> Git -> Git Repositories -> OK
5. Right click on your root directory in the menu Push to Upstream -> Next
6. See your project published on GitLab website.
To perform other basic Git operations in Eclipse familiarize yourself with online Eclipse Git Tutorial.

