This is a quick workaround for those of you who has older versions of Eclipse installed and can’t get Git plugins working with it.
1. Leave your old Eclipse instance intact and download newest version of Eclipse from https://eclipse.org/downloads/ for your OS platform accordingly. The latest version at this time is Eclipse Mars 4.5.1.
2. Log in to https://git.cs.du.edu and create a project. Do not worry about your SSH key at this point. Click on the name of the project under activity tab. Click on HTTPS and copy your project URL
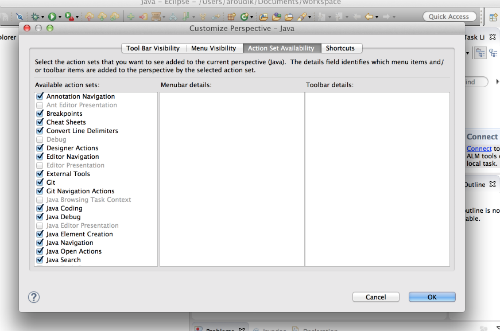
3. Start Eclipse, go to Window -> Perspective – > Customize Perspective -> Action Set Availability and check Git and Git Navigation Actions. Check Git in Menu Visibility and Tool Bar Visibility tabs.
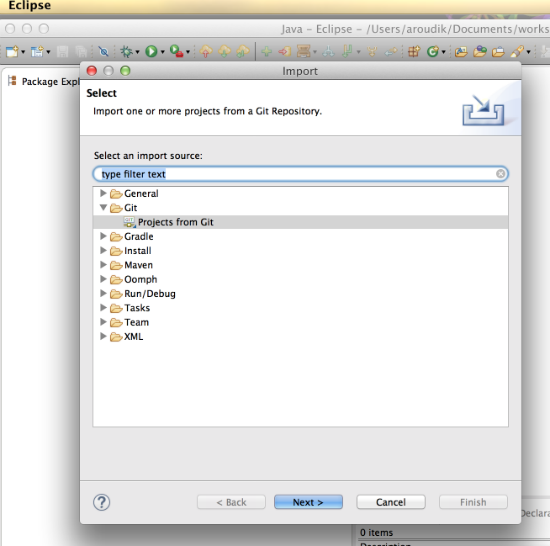
4. In the main Eclipse window right click on the left pane and click ‘Import’. Choose ‘Git’ – > ‘Projects from Git’.
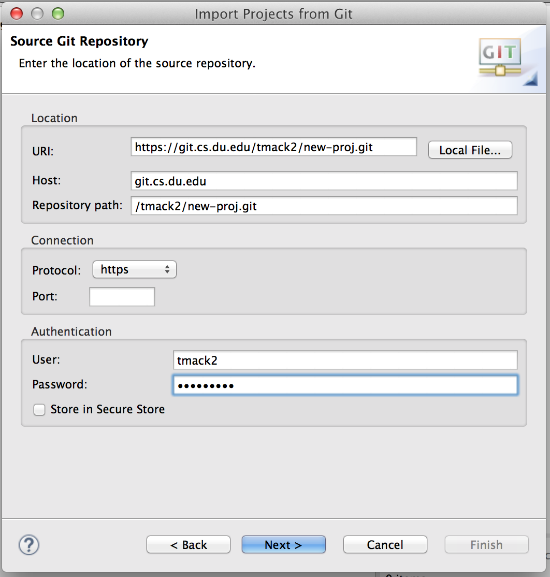
Check “Clone URI” and paste your project HTTPS URL into the URI box. Type in your username and password and click next.
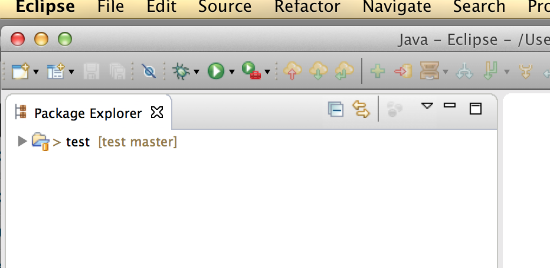
Choose local destination directory. Can be any. Choose “Import as general project” and give the project a name. Here is what you get.
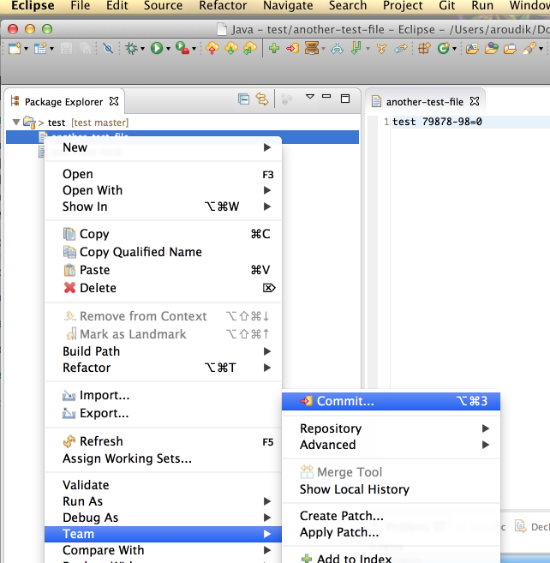
5. Now you can create a project or copy an existing one into this workspace. To start a new project right click on a workspace and choose what you are going to create. I am just creating a text file for testing purposes. Right-click on the file and choose Team -> Commit
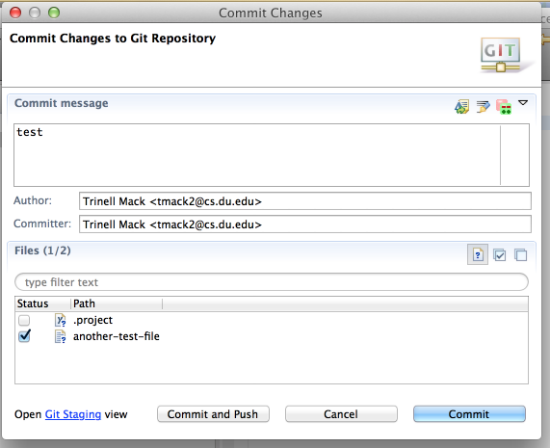
6. Type in your commit message and check the file you are going to commit.
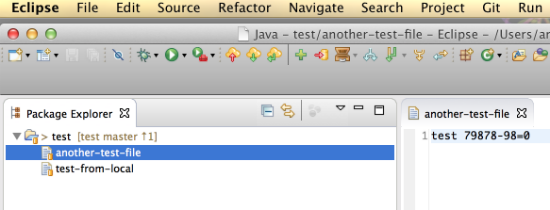
7. Now your files are pushed to Git server and you see them locally as under Git control.
8. You are done.
Submit all technical support requests via the DU Help Desk at go.du.edu/supportrequest.


