Setting Up Git for a Class
Setup
This setup is an example and the instructor for your class may give you some more specifics/differences for your particular class setup.
In your web browser, go to https://git.cs.du.edu. Login using your Computer Science Unix username and password (if you don’t have a user name and password, or if you have trouble logging in, please contact CS system administrator Andrei Roudik by e-mail (aroudik@cs.du.edu), by phone (303-871-3299), or just stop by Aspen Hall Suite 100B.
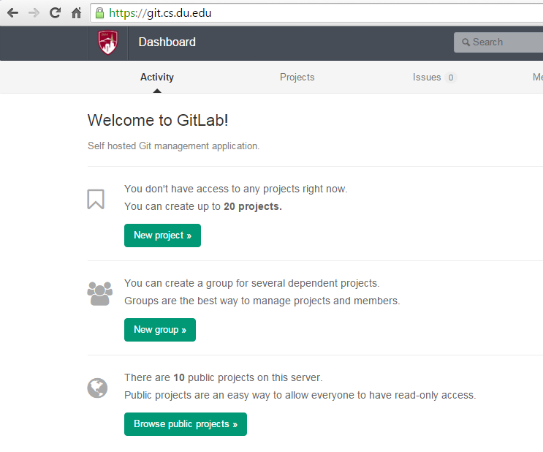
Log in to the Git server. You should see the “Welcome to GitLab!” screen if you haven’t created any projects, or else your GitLab dashboard (clicking on the DU logo in the upper left will return you to this screen from other GitLab pages):
Creating a Group and Adding Members
Groups in GitLab refer to groups of projects, not your Assignment Group in Canvas. Click on “New Group”. Give it a name related to the class. Group names must be unique across all CS users of the GitLab server. Pick a name which incorporates the class, the quarter, the section number and your assignment group ID (if you’ve already created a group, you don’t need to change it). For example, you might use COMP2370-F2015-1-group99. Other fields are optional. Click on “Create group”. You’ll see the group screen.
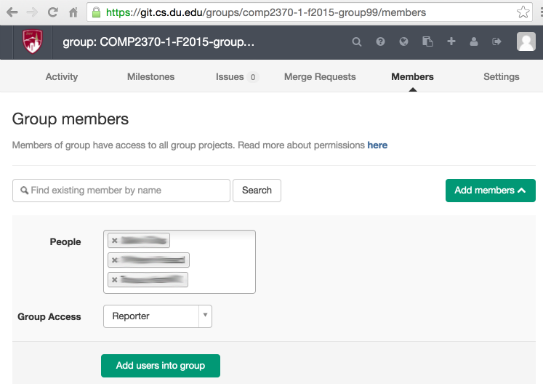
If you’re working in an Assignment Group with someone else, just one of you should create the group, and then add the other person (Important Note: your teammate must have logged in to the GitLab web interface at least once to initialize her/his GitLab account). To add a group member in GitLab, click on “Members”, then click on “Add Members”, find your teammate in the People list, and select “Master” or “Owner” for the Group Access (this is required to create and modify projects). Then click “Add users into group”.
Whether or not you are working in an assignment group, you should create a group in GitLab. After optionally adding a teammate, you should also add your instructor (“username”) and your GTA (“username”) with Group Access set to “Reporter”:
Creating a Project
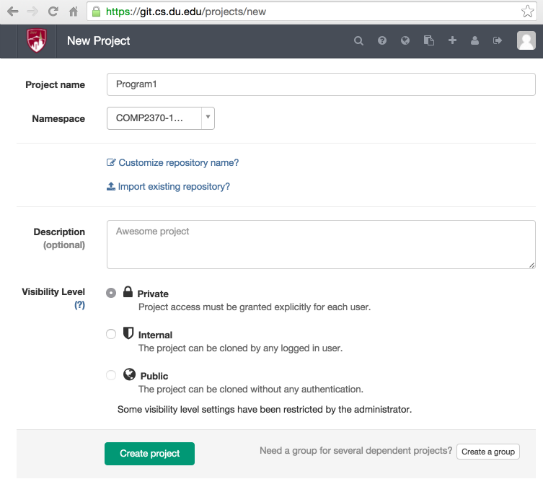
Once you’ve set up your group, you can create projects within the group. You should use a separate project for each programming assignment. To create a project, click the “+” icon on the gray title bar at the top of the window. In the resulting “New Project” window, enter the assignment name (such as “Program1”) for the Project Name field, and select your group in the “Namespace” pulldown. The Visibility Level must be set to “Private”, so that only users to whom you have given permission can view the project. Click “Create project” at the bottom of the window when done.
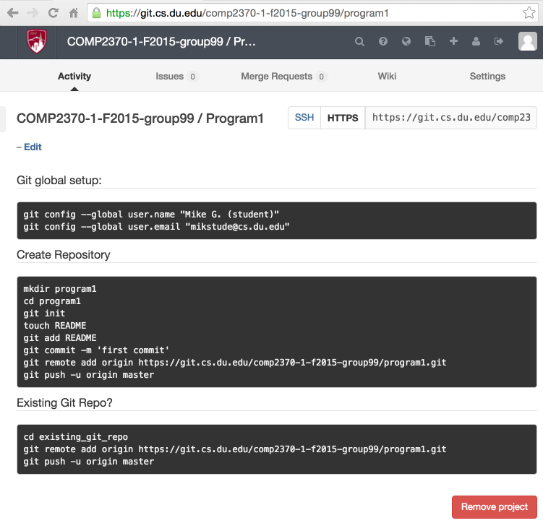
Once you’ve created the project, it will be available to all group members. To initialize the project in NetBeans or Eclipse, you’ll need the HTTPS URL for the project. On the project page, upper right, you’ll see a box that has SSH, HTTPS, and a URL. Click on HTTPS to show the URL, and then copy it for use in NetBeans or Eclipse. One of the team members (if you’re working in an assignment group) should initialize and commit the project. The other team member can then check out the project, and you’ll be all set to collaborate. See the instructions for NetBeans or Eclipse for further instructions. Note that the commands shown in the boxes lower on the page are only needed if you’re using the command line version of Git; NetBeans and Eclipse do all this for you without needing to use the command lines.


